Chainsaw Chain Sharpening Guide
- Share
- Issue Time
- Dec 16,2022
Summary
Manually sharpening a chainsaw chain for the first time can be a bit daunting, and you must follow this guide to make sure you sharpen it properly.
Manually sharpening a chainsaw chain for the first time can be a bit daunting, and you must follow this guide to make sure you sharpen it properly. A sharp chain is absolutely essential for an efficient working saw.
Chainsaw Chain Sharpening
These 13 steps will guide you through the chain-sharpening process:
1. The first step is to check the size or specification of the saw chain. This is the easiest step if you keep the packaging when you buy your new chain. You will need to buy a chainsaw file that matches the type of chain. Chain saw teeth come in a variety of sizes, and the file diameter you choose must be the right size for your saw. Many manufacturers sell file kits, and it's worth buying one with your saw. If you're still in doubt, take your saw to the nearest garden machinery store and they should be able to match you with a file kit.
2. Always clean the chain thoroughly. It is recommended to use mineral spirits or degreasing fluid to remove oil, dirt, and debris from the chain. Be careful not to use too much cleaner on the engine or other parts, as some of these products can cause irreparable damage to the plastic housing and other parts.
3. Next check the chain for any damaged or excessively worn links and teeth. Individual teeth may have chipped, broken, or bent; these can become very dangerous during use. Any damaged, weakened or excessively worn chain should be discarded.
4. You should place the saw on a solid surface, or preferably hold the blade in a vise. The saw must be steady to file safely and accurately. Clamp the bar in a vise (but not too tight, you don't want to damage it), the jaws grip the bar, and let the chain spin freely.
5. Find the shortest knife on the chain. If all knives look the same length, you can start anywhere. The reasoning behind this is that you need to file each knife so that the flats at the top of the knife are almost the same length. This ensures that each cutter cuts the same amount of wood as the saw cuts.
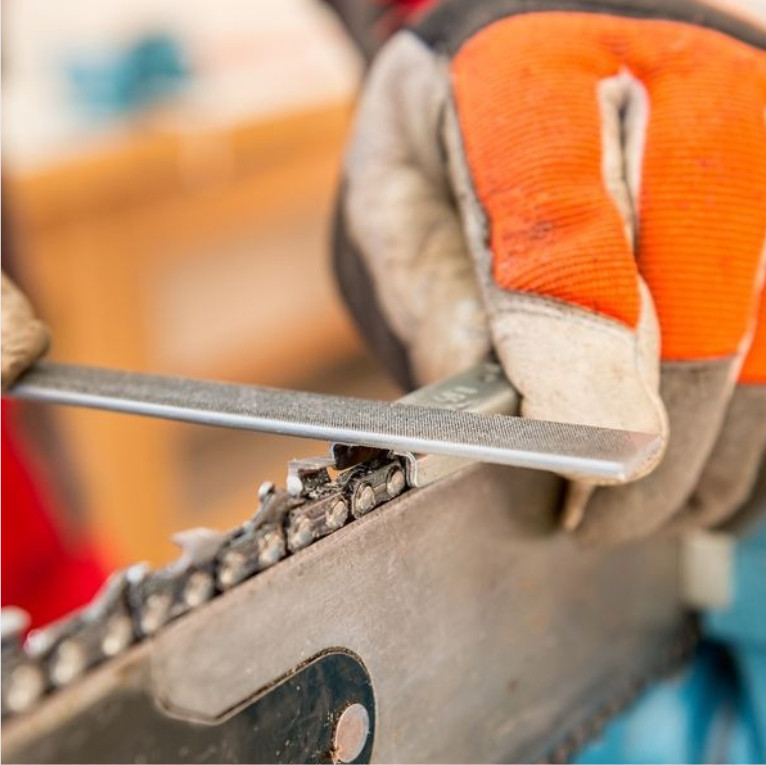
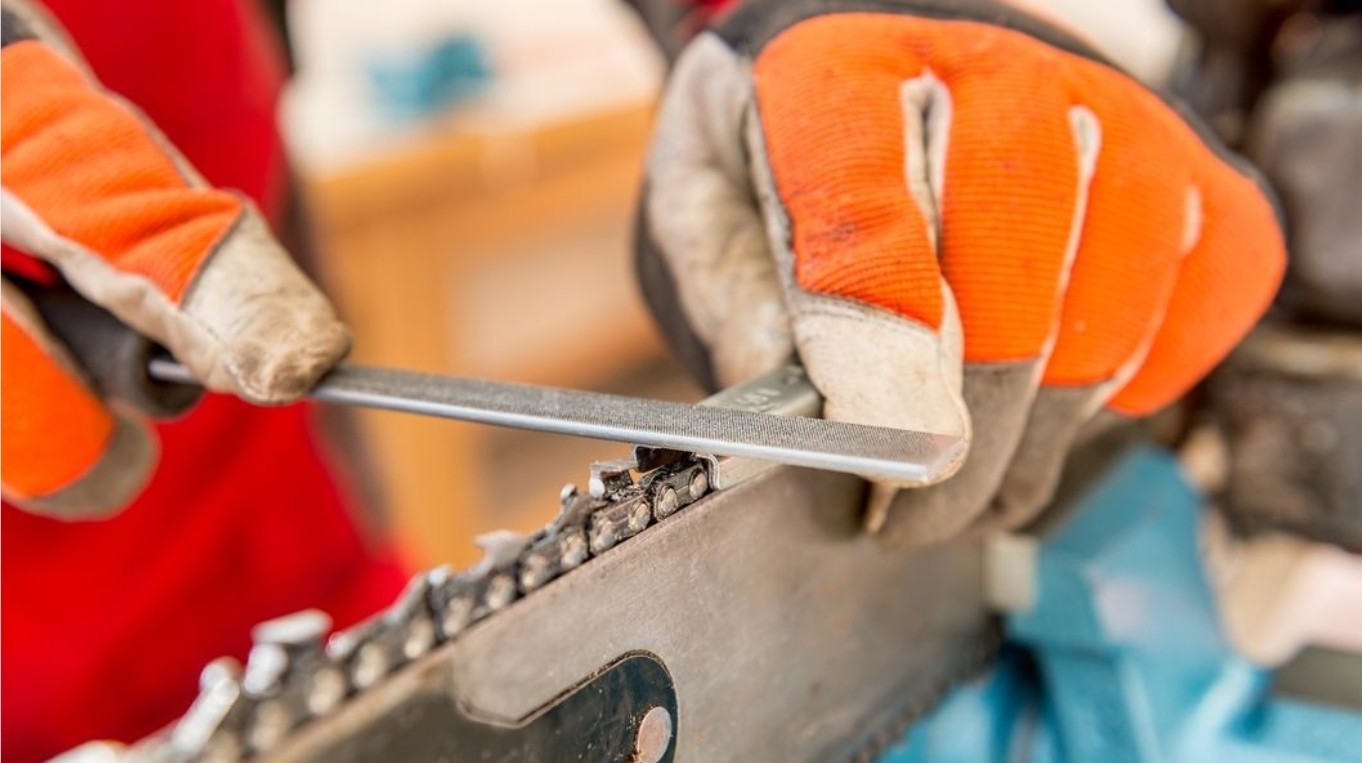
6. Place the file in the notch on the front of the knife. This is the helical tooth in front of the link plane. The curvature of the file should match the curve of the tip surface, and the top of the file should be almost flush with the top of the tooth.
7. Set your file at the same angle as the leading edge of the blade (almost diagonally across the stem). Essentially, you should hold the file at the same angle at which the knife begins to grind or file. Must match the angle at which the chain was originally machined. Some jaggies have witness marks as a visual aid.
8. We can now start sharpening. Slide the file across the face of the mill, using a twisting motion to discard the removed filings. The best direction to push the file in is still debated, but generally, you'll push the file from the short side of the angle to the long point. This should leave a smoother cut surface.
9. Be consistent now. Treat each tooth on the chain the same way. You need to rotate the chain around the bar so the tooth you file is always on top.
10. Now change the side of the saw and work around the unfiled teeth that are angled in the other direction. Note the length of each flat on the knife. If you want to be 100% accurate, you can measure each tooth with a caliper for optimal cutting performance.
11. If you purchased a sharpening kit, it should come with a tool for checking the gap between the knives and the curved hook links. This tool is placed on top of the blade. If the gauge is too high, it must be filed and this tool will protect the adjacent teeth when you fill the gauge. They should clear each cutting edge about 2.5mm below the cutter. This measures the number of chips removed each time the tool passes through the wood.
12. Use a flat file to file off any depth gauges that are too high.
13. Grease your chain liberally. Tighten the chain if necessary. Turn the saw's tension adjustment screw until the bottom of the lowest strap and cutter emerges and touches the bottom of the bar rail. Chain tension on solid noses should be adjusted looser than on sprocket noses. Regardless of your barbell type, your chain should move freely around the barbell.
The above details the steps of sharpening the chainsaw chain, if you want to buy a new chainsaw chain, please contact us.
HUSTIL is a professional custom garden tool spare parts manufacturer. We provide our VIP users with a full range of accessories search queries, garden tool accessories replacement, and after-sales service. After 10 strict screenings, it now has a supply chain factory of 300 mature suppliers and is an accessories manufacturer with 19 years of experience.